Lightroom Mod APK
https://lrmodapks.com
Lightroom provides the latest information regarding the latest version of lightroom mod apk which may help users while using lightroom. Thu, 06 Nov 2025 22:47:44 +0000en-US
hourly
1 https://wordpress.org/?v=6.9https://lrmodapks.com/wp-content/uploads/2023/12/cropped-lightroom-32x32.pngLightroom Mod APK
https://lrmodapks.com
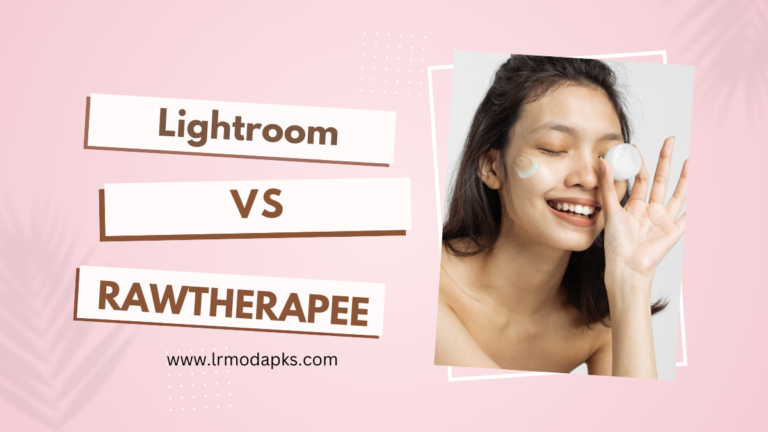
3232Lightroom vs RawTherapee which one is best to use? 2025
https://lrmodapks.com/lightroom-vs-rawtherapee/
https://lrmodapks.com/lightroom-vs-rawtherapee/#respondSat, 28 Sep 2024 17:46:00 +0000https://lrmodapks.com/?p=1134
Rate this post
Lightroom vs RawTherapee
Lightroom is a powerful image and video editing application with many features used worldwide by millions of users, Lightroom was discovered by the Abode family. It is a photographic application Mostly used for editing of images and changing the look and background of pictures and videos. Lightroom has amazing features for the editing and collection of images.
Here you can make friends and can use it friendly, it is a powerful editing tool used for the excellent adjustment of images. On the other hand, Rawtherapee is also a powerful editing tool, it also has many same features that are related to Lightroom Application, but some tools separate both applications from each other.
It is a free application with open Raw picture sources. Rawtherapee has millions of users and due to having interesting features its number of users is increasing day by day. With a high customization, it is a free and open resource for editing of pictures. It is a light application due to regular updates.
What is Lightroom VS Rawtherapee?
Lightroom is a powerful editing Application used for the editing of pictures with many features that help in editing of pictures and videos, mostly used in Photoshops for editing, a professional photographer can accurately use Lightroom and can get the best results at least. As we discussed, it was discovered in 2007, but new and higher versions were added in 2022 with some major updates.
Features of Lightroom
It is used for the management and editing of images and videos that are already taken by some devices/cameras. I want to clarify the concept about Lightroom that it is not used for the creations of images, but just for editing images.
Lightroom is not an open-source raw application. It had separate tools from Rawtherapee, which creates a difference between the two applications.
The first Lightroom was discovered by Mark Hambrag in 2007. But those features are present in Lightroom and were not added at the start, changes occurred with time.
The two main programming languages used in this are Cont++ and Lua. Lightroom was created by using these languages.
Lightroom is a cost Application because to open important versions paying charges or a subscription is necessary for Adobe Lightroom. Without a subscription, you cannot properly use Lightroom for interesting results.
For the saving of images and videos for future use you will use XMP catalog files, which is opposite to the Rawtherapee saving pattern.
Daily, Lightroom is getting a high number of users and high ratings, due to the advanced features and tools present in Adobe Lightroom, you can edit in Lightroom within a few minutes as compared to other editing devices.
Lightroom became famous by using the word “SaaS “A professional photographer can understand SaaS, its meaning is’ software as a service”.
Pros and cons of Lightroom
Here are the Pros and Cons of Lightroom;
Pros
By using non -non-destructive modes Editing images and videos in a few minutes with fast and quick patterns.
There are many tools present in Abode Lightroom like Brush and Gradient tools play a role in masking and removing scratches.
Many files that are used for saving and editing pictures are supported by Abode Lightroom.
If you beginner and this is the first process for you to use Abode Lightroom for editing, then there is no need to worry you can learn to use Abode Lightroom in a few days because it has easy and simple features.
Here you can save your private things and images as memories, and make some social friends for more entertainment.
Cons
For using new and advanced features in abode Lightroom you will need to Subscription.
Or it is not a free application to use by paying some charges monthly you can use and enjoy new versions.
There are no proper updates, and many users report against functions of layering management.
Not properly using any tool during the time of editing, has an effect on results, it may cause wasting of time because you will need more time to start again this process.
What is Rawtherapee?
Rawtherapee was first discovered in 2009 but new versions were added in 2020 almost, after that this Application got a huge number of users and a high rating. Rawtherapee is a powerful editing Application, having non-destructive modes used by different types of photographers for the editing of photos or videos. Now Rawtherapee has millions of users and many numbers of languages mostly one hundred fifty plus countries use this application.
Features of Rawtherapee
It is an application used for the creation of images, with the creation of pictures and videos you can also use this Application for editing pictures and saving these for the future.
As we discussed Abode Lightroom VS Rawtherapee is a closed-source application but Rawtherapee is opposite to Lightroom because it has an open-source software application.
In since of 2009, It was discovered by Gobar Horvath,
Rawtherapee is the biggest discovery of Gobar Horvath in his era.
Rawtherapee was created by using a programming language of C++, there is no proper work of Lua. With simple language, it also has simple features everyone can use after short learning.
An interesting feature of Rawtherapee is that it is a free application and you can open its advanced versions for free, due to this reason most users pick Rawtherapee as compared to Abode Lightroom.
Pros and Cons of Rawtherapee
Here are the Pros and cons of Rawtherapee;
Pros
It is a free application, there is no need to pay some costs for the Opening of new features or versions.
It supports different file formats like TIFF and PNG. These files are important during the creation and saving of pictures.
An interesting file is present in Rawtherapee that is different from the above files, it is known as a sidecar file, which allows you to upload pictures fully or in particular in a style as you wish. It will make you more impressive in your images.
If you beginner in Rawtherapee then you should need to use Rawpedia, its main benefit is that you can get a huge knowledge about features and versions of Rawtherapee.
The installation process is so easy for Rawtherapee, and after installing you should directly log in and use it to create pictures within a few minutes.
Cons
The first and main disadvantage of Lightroom VS Rawtherapee is that if you make the file in new versions then you will not be capable of using this file in older versions. As we have seen many applications that are related to Lightroom VS Rawtherapee, are used for friend sharing.
Lightroom VS Rawtherapee has no features like that for making and sharing collections with friends, in short, it does not prefer to interfere with other people. Many users report against Rawtherapee due to technical issues, because they didn’t give proper updates. Lightroom VS Rawtherapee has limited features no HDR, and no built-in image managers.
Conclusion
Abode Lightroom VS Rawtherapee are cost Applications, to open new versions you will need to pay some charges here, but in Rawtherapee you will not worry about charges it is a fully free application with many new versions. Rawtharpee has a Raw process that is a complex system but Lightroom has new advanced features that give excellent results. Lightroom VS Rawtherapee does not prefer to interfere with other social people, you cannot share and import your collection to friends on Rawtherapee but Abode Lightroom has this feature.
I will recommend you if you want advanced and new versions and want to make a collection of comprehensive images then need to select Abode Lightroom VS Rawtherapee. Thus you should need to pay some charges every month or after a few months. And If you want to create and edit images in free Lightroom VS Rawtherapee will be best for you. You can complete your task for free with advanced features and tools, but here You will need to give more time as compared to Lightroom VS Rawtherapee.
Frequently Asked Questions
No, Abode Lightroom VS Rawtherapee is not a free application for opening new versions or tools you will need to pay some charges but in against Lightroom VS Rawtherapee is a free application with many new features.
Yeah, easily you can send or receive your images or videos by using Abode Lightroom with sharing them with social friends.
Rawtherapee doesn’t prefer to interfere with social friends so there is a bit difficult process of importing your collection to friends.
]]>
https://lrmodapks.com/lightroom-vs-rawtherapee/feed/0How to Make HDR & Panorama Photos by Using Lightroom? 2025
https://lrmodapks.com/hdr-and-panorama-photos/
https://lrmodapks.com/hdr-and-panorama-photos/#respondSat, 07 Sep 2024 18:59:40 +0000https://lrmodapks.com/?p=1109
5/5 - (1 vote)
How to Make HDR & Panorama Photos by Using Lightroom?
Adobe Lightroom is one of the widely used photo editing applications, and it provides some fantastic tools for beginners to advanced-level photographers. The rise in its fame is due to the provision of a smooth and easy interface with some valuable tools as well. You can edit and make bundles of photos by utilizing its newly added photos.
Similarly, some fantastic types of HDR and Panorama photos can be easily enhanced and put to a high-quality outlook by utilizing the unique features of Adobe Lightroom. Here, we will discuss some easy and handy tips to make HDR and Panorama photos within Adobe Lightroom.
What do you mean by HDR Photos?
HDR stands for high dynamic range, hence you can say it is a type of photos that consists of high dynamic range. It especially stands for the capturing of photos like contrasts between light and darkness such as sunrise and sunset views. Capturing between these dynamics puts some sort of high ranges where you can get some exceptional results as well. Several techniques like multiple exposure, combining exposure, and separate exposure are beneficial to be utilized.
What do you mean by Panorama Photos?
Panorma is a technique widely used for the combination of photos with different sorts of views. It combines two or more two photos and puts them in the form of some exceptional seamless and expansive pictures. It is widely used for landscape and cityscape views where you can combine different sides and views within one frame as well.
Steps to Create HDR & Panorama Photos on Lightroom
There are following few easy and understandable steps in Lightroom to create HDR Photos as well as Panorama Photos.
Step 1: Import in Lightroom
First of all, you need to make it sure that you have the latest version of Adobe Lightroom. Then open the application and click on “import”. Now, you need to open the photos library and import the photo that you want to edit. You can use CRTL for Windows and CMD for MAC to import your images within the images library.
Step 2: Cropping
You need to crop your photo and bring it very fit just according to your desired size. You should trim and cut the extra space and places within the photo so that your desired objects can be enhanced easily. You can also skip this step but it will be more better if you gonna use it.
Step 3: Merging Point
Merging HDR: When you have selected a photo, there is an option of merging HDR just on the right side of the picture. It is one of the mandatory options to be selected as well. There are some short keys like CTRL+H for Windows and CMD+H for MAC.
Merging Panorama: Similarly, you can merge your photos with Panorama. There is a “panorama” option in the dropdown option with Lightroom.
Step 4: Adjustments
There are some HDR settings that you need to clear as well. By optimizing these options you can easily get some exceptional results while making HDR photos.
1: Applying Auto Settings – There are some auto adjustments and settings that you need to hit. It will put some automated results within your photo.
2: Applying Some Alignments – You need to align your photos if they are hand-helded. The better alignment of photos will produce better results.
3: Adjust Movement – You need to adjust between the movements among different types of effects and filters applied within HDR Presets.
Step 5: Fine-Tune
When all adjustments are successfully applied and the final image is ready then you can select it for the fine-tuning process. The final image will be in the form of a “ .hdr or .dng “ file. You can make your fine-tune by utilizing some other options within exposure, brightness, and contrast as well.
Adjust Panorama Photos
1: Projectile Mode – here, you need to fix the projectile style and degree of your photo.
2: Most, for a wide range a 360-degree projectile is best.
3: Cylindrical landscapes are also so best for landscapes.
4: Boundary Warp: Help to fill out the spaces between the edges of photos. Do it until you can not get seamless results.
5: You can go with automatic cropping of images to get exceptional panorama results.
Utilizing HDR & Panorama Lightroom Presets
HDR & Panorama Lightroom Presets are another best option to be hit and you can manage it within Lightroom. These Presets are already designed templates that carry some sort of amazing and beautiful results within HDR as well as Panorama Photos criteria.
There are unlimited HDR and Panorama Presets given within Lightroom. You need to explore these presets and put in some exceptional HDR and Panorama effects. Choose the best combination between these HDR and Panorama presents and the outlook of your photos.
Both HDR and Panorama are some sort of wonderful techniques that can be easily utilized within Adobe Lightroom. You can just make some sort of classical HDR and Panorama results by utilizing these above-discussed easy steps. HDR and Panorama techniques will make your photos and pictures so smart and awesome. That is why, these are the most used techniques to enhance the outlook of pictures.
Frequently Asked Questions
You can select two or more two pictures that mainly depend upon the form of your panorama view.
You can easily create HDR Photos by utilizing Lightroom on your PC and get some wonderful results as well.
It will be helpful if you gonna want some quick results by saving your time.
]]>
https://lrmodapks.com/hdr-and-panorama-photos/feed/0Tips to Fix the Blurry Images in Lightroom with Different Methods [2025]
https://lrmodapks.com/tips-to-fix-the-blurry-images-in-lightroom/
https://lrmodapks.com/tips-to-fix-the-blurry-images-in-lightroom/#respondWed, 28 Aug 2024 13:18:42 +0000https://lrmodapks.com/?p=1078
5/5 - (1 vote)
Tips to Fix the Blurry Images in Lightroom
If you are worried about how to fix blurry images then we are here to solve your long-term problems. In many cases, we saw users were frustrated over the blurriness of the images because they did not have a way to remove them. If you are working hard to remove this destruction but are still struggling to remove it and cannot find a proper way to remove this blurriness from the images. So, we are here to provide you with different tested methods of Lightroom that will help you fix blurry photos and make them clear and shining. So, read this article carefully and we hope that after reading this you can fix blurry images.
Tips to Fix Blurry Images
If you are editing on desktop or mobile devices by using Lightroom Classic or Lightroom CC then you must know the methods that are used to fix blurry images. Everyone has no DSLR or good camera and because of this reason, the images they capture are blurry.
Read this article carefully and learn how to fix blurry images by using different tools and techniques;
1: Sharpening Tool
This is the tool that is used to remove the blurriness of images in no time. You can remove the blurriness from the images in a few minutes with just a single click. This is the simplest process of Lightroom where you can remove the blurriness from the images in no time. Simple to use this tool go to the detail button in the right panel of the develop module where you can find the different sharpening tools that are described below.
a) Amount Slider
This is the method or tool of Sharpening that is used to sharpen the image with more detail and depth. You can reduce the blurriness from the images by using Amount sliders. The lower values of the Sharpening tool will reduce the overall strength or resolution of the images while the higher value of the slider will enhance the overall strength or sharpness of the images. So, use the preference of the Amount slider wisely to control the sharpness of the images and to maintain the quality of images.
b) Radius Slider
This is the slider that is used to regulate the size of sharpening. You can make your image more clear and detailed by using the Radius Slider of Sharpening Tool. You can determine the width of the sharpening effect by using Radius. The reducing Radius will sharpen the details, while the increasing Radius will affect the broader edges of images. So, use this Slider to make the edges of images broader or to make the fine starting point of the images.
c) Detail Slider
This is the method that is used for the fine-tuning of the images to make them clear. You can control the emphasis that how much finer detail is put on the images. You can sharpen the large edges of the images if you lower the primary values of the Detail slider. If you are making the higher value texture of Detail Slider then you can get a higher texture on your images. So, use the detail slider to sharpen the detail and texture of the images.
d) Masking
This is the part of the sharpening tool that hides the desired part of the image. You can reduce the noise and improve the overall quality of your images. The best advantage of this part of the Sharpening tool is that you can avoid sharpening those parts of images that could be important and smooth. Masking allows you to select those parts of the images that you want to hide and also it allows you to black and white the specific parts of the images.
2: Clarity Tool
As the name shows it used to improve the quality of your images and it used to clear your blurry images. You can get an amazing look at your images by fixing the blur in the images. This tool will remove the grain from your images that is making your images blur. The key point regarding this tool is that you must use it wisely and carefully because much use of it can lead to the harsh edges of the picture.
3: Brush & Presets
Adjustment Brush is used to fix only those blurred sections of the images. Adjustment Brush only works on those parts that are blurry and work in a few specific sections of the images. Presets are the best ways to edit and save your images with high quality and amazing structure of the images. Presets are the best way to unblur your images with high-quality background.
How Can You Avoid Blurry Images?
To avoid Blurry images you must follow the given guidelines and apply them when you are capturing the images;
You should grip the camera tightly with both hands.
You must lay your hand on the smooth surface.
Pull up the legs tightly to avoid any unexpected movements.
Must capture the picture object that is not moving.
Lock the camera with a specific timer option.
Conclusion
If you know how to fix the blurry images then this is no less than a blessing for you. Here we tried our best to provide you with the latest methods of fixing the blurry images in Lightroom Mod Apk. The other thing that everyone should care about is that you must wisely use the given tools to avoid any kind of distractions in your images. The excessive use of these tools can crash the quality of your images. So, use these tools wisely and make your images clear and detailed.
Frequently Asked Questions
Yes, the use of Sharpening tools is safe and secure. You can make your images clear and sharpen by using the different methods of Sharpening Tools.
The clarity tool is easy to use and everyone can use this tool with a little bit of knowledge. So, use this tool wisely to avoid any disturbance.
Yes, Lightroom allows you to fix the blurry images and you can get the best results of your images. In Lightroom Premium, you can get all of these features for free.
]]>
https://lrmodapks.com/tips-to-fix-the-blurry-images-in-lightroom/feed/0Tips & Tricks to Remove Objects in Lightroom Mod Apk Premium Unlock Latest [2025]
https://lrmodapks.com/remove-objects-in-lightroom-mod-apk-premium-unlock/
https://lrmodapks.com/remove-objects-in-lightroom-mod-apk-premium-unlock/#respondMon, 26 Aug 2024 17:01:09 +0000https://lrmodapks.com/?p=1069
5/5 - (1 vote)
Remove Objects in Lightroom Mod Apk Premium Unlock
Lightroom Mod Apk Premium Unlock has powerful tools and techniques that help the professional editor make changes to your images in no time. So, if you are a beginner or professional and want to remove unwanted objects from your images then you must go for this technique of Lightroom Mod where you can easily remove the unwanted objects from your images. Here we will try our best to guide you to remove all of the unwanted objects from images and videos and how you can make them clear by using this technique of Lightroom Mod Apk Premium Unlock. So, read this article carefully and learn the techniques to remove unwanted objects from your images to make them clear and clean.
Tools to Remove Objects in Lightroom Mod Apk Premium Unlock
Sometimes users face difficulty in removing unwanted objects and here we come to provide you with the Lightroom Mod Apk with all of its premium features unlocked. If you are a Professional Photographer and want to save your precious time then you can get all of these results in just one click sometimes if you want to remove one person from your image then you must know how to remove one object from the image by using the Premium Unlocked Features of Lightroom Mod Apk. Here are the tips and tricks to remove unwanted objects from the images by using Lightroom Mod Apk Premium Unlocked.
Here are the key Tips & Tricks to learn about how to remove unwanted objects from the images;
1: Use Healing Brush
This is the feature of Lightroom Mod Apk Premium Unlock where you can correct the imperfections. You can easily access this feature of Lightroom Mod by navigating to the Develop Module settings of Lightroom Mod Apk Premium Unlock. You can remove the blemishes and dust particles from the images and also Lightroom allows you to paint on the affected area of the images by using the different healing brushes of Lightroom. In Lightroom Mod you can adjust the size of the Healing Brush By using the sliders of Healing Brush that are available in the setting panel of Lightroom.
2: Use the Clone Tool
If you are not satisfied with the results given by the Healing Tool of Lightroom Mod you must go for clone Tool. It will help you copy and paste the style of different areas where you can adjust the frame and those areas of images that are distracting. For example, your friends took a picture at the beach and now they want to hide that area where the ship is seen behind the image. So, this tool will be helpful for you to remove unwanted objects from the background of images. So, if you want to remove anything from the background of your images this feature of Lightroom is most suitable for you.
Tricks to Remove Unwanted Objects from the Images
Here are the Tips and Tricks to Remove Unwanted objects from the images by using the unlocked Premium features of Lightroom Mod;
1: Understand the Purpose of Object Removal
This is the first Trick to remove unwanted objects from the images with unlocked premium features. Before removing the unwanted objects from the images you must know the purpose of removing the unwanted objects. You should be aware of the Purpose and why you want to remove the object. To make your images clear you must understand the functionality of object removal.
2: Understand the Complexity of Object Removal
In this step, you must know about the complexity level of Objects that you want to remove. In this step, you should learn about tools like healing Brush and Clone Tool. After learning about these tools you should know the position of your images that creates distractions in your images. You should learn about those sides of images that create distractions in your images. By learning about the complexity levels of objects you can erase those objects with ease.
3: Approach to the Right Tool
When you completely get involved in object removal then the first thing you should know about is the location of unwanted objects. You should know about the location of those objects that distract your images. After locating the exact location of unwanted objects the other thing is that you should approach the right tool. So, choose the content remove tool if you want to remove the specific objects from the gang of different objects. So, the approach to the right tool is crucial to remove unwanted objects.
4: Explore the settings of Tools
To make your images clear before proceeding to any of the tools you should explore the settings of different tools and techniques. You should explore the all settings of Lightroom where you should learn about adjustment expertise of unwanted objects. If the given above tools do not work properly then you should move on to different tools of Lightroom CC in which stacking of Healing and combining tools are included that are used to hide the unwanted objects of images.
Conclusion
If you are a Professional Photographer and capture many pictures in a day then you must have some expertise in Lightroom Mod Apk feature where you can remove unwanted objects from the pictures. Once you capture multiple images then the next procedure is to edit these images and this feature of Lightroom Mod Apk Premium Unlocked could help you to remove the unwanted objects from these images. So, learn to use the Lightroom Mod Apk Premium Unlock and get access to all of the unlocked features including removing unwanted objects.
Frequently Asked Questions
While Lightroom Mod Apk Premium Unlock is only restricted to remove the small objects from the images it might be struggling to remove the large objects from the images.
You can remove the unwanted objects from the images by using different tools in which Healing Brush and Clone Tools are included.
Yes, you can fix the imperfections in the images that are left after removing the unwanted objects. You can also manually adjust the image’s imperfections by using different tools.
]]>
https://lrmodapks.com/remove-objects-in-lightroom-mod-apk-premium-unlock/feed/0Batch Editing Tips and Tricks to Edit Multiple Images at a Time in Lightroom [2025]
https://lrmodapks.com/batch-editing-tips-to-edit-multiple-images/
https://lrmodapks.com/batch-editing-tips-to-edit-multiple-images/#respondSun, 25 Aug 2024 16:27:51 +0000https://lrmodapks.com/?p=1060
5/5 - (1 vote)
Batch Editing Tips and Tricks to Edit Multiple Images
If you are a professional Photographer and want to edit multiple images in no time then we are here to provide you with the batch edit feature of Lightroom where you can edit multiple images at one time. We will share the best method to edit multiple images in Adobe Lightroom. If you are a professional photographer and you have so many pending orders to deliver you must get the benefit from this feature of Lightroom that will edit multiple images at a time. Here we will share the method of batch editing in Lightroom Classic and Lightroom CC and how a Photographer can edit multiple images in no time.
Batch Editing in Lightroom Classic
Lightroom Classic is used to edit images on a desktop or Windows. Lightroom Classic is the basically desktop version and it was introduced a long time ago for those users who want to edit their images on a bigger screen. So, if you are a professional Photographer and want to edit your pictures on a bigger screen then Lightroom Classic is the best option for you. So, if you want to edit multiple photos using Lightroom Classic, you must learn the different techniques and tools for it. Here we will share the different methods of Batch Editing for Lightroom Classic.
Batch Editing Method for Lightroom Classic
Here are the different Methods of Lightroom Classic to edit the Multiple images at a time;
1: Applying Import Presets
Import all your selected images in the Import Module to edit at a time.
Open the folder where you have imported your selected images.
In the Main Panel of the Import module, you can find your imported images.
You should select your favorite custom present to apply to all the selected images.
After the selection of custom presets Lightroom Classic will automatically apply to all selected images.
After some time your images will be edited and you can save your precious time.
2: Apply Library Module Presets
Here you should import your images from the local storage device to the library instead of the Imported panel.
Before importing images into the library module you must select all of the images that you want to edit at one time.
Go to the Develop panel of Lightroom where you can find your favorite presets.
Apply one of your favorite presets and Lightroom will automatically apply to all of the selected images.
In the Library Module, you can also apply custom edits to your image if you want to change something.
3: Copy and Paste Settings of Lightroom Classic
Use the ctrl c for copying and ctrl v for pasting if you are a user of Desktop or Windows.
Use the Command +C for Copying and Command +V for Pasting if you are a MAC user.
Go to the Library Module and select the images you want to edit.
To select your desired preset go to the develop module of Lightroom.
If you want to copy from the settings of Lightroom Classic then use Ctrl C for Windows and Command +C for MAC.
After copying the settings from Lightroom hold down the key and paste it into the library Module by using Ctrl V for Windows and Command +V for MAC.
After this copying and pasting setting all of your desired images will be edited and you can opt out of letter use.
4: Synchronization and Auto Synchronization for Batch Editing
Select the images from the library module that you want to edit.
Edit one of the images by adjusting its color, contrast, and highlighting by using the Develop Module.
Select the images that you want to sync with the other images.
Click on the sync button and Lightroom will apply the exact settings of edit images to the other images.
If you will open the auto sync button of Lightroom then Lightroom will apply all of the settings of edited images automatically to the other images that you want to edit.
Batch Editing in Lightroom CC
Lightroom CC is the type of Adobe Lightroom that is used across all devices including iOS, Android, Windows, and MAC. In short words, you can edit your images on all devices by using this version of Lightroom.
Follow the given guidelines to edit multiple images on Lightroom CC at a time;
Download the Lightroom CC and open it on your device.
Go to the storage or library of Lightroom CC.
Select and Upload an image that you want to edit manually.
Click on the three-dot menu and copy the all styles of edited images.
Upload all those images that you want to edit.
Apply the specific design that you copied from the edited images.
Paste the style and Lightroom will automatically apply the design.
In a short time, you will get all of the edited images.
If you want to change something then Lightroom CC also allows you to edit manually.
You should use the same steps if you want to edit the images on iOS or iPad by using Lightroom CC.
Benefits and Drawbacks of Batch Editing
Benefits
It allows you to apply the same changes on all images to save time.
It is helpful for professional photographers who want consistency in their images.
It reduced the chances of error by minimizing the manual work of an editor.
It helps you to save money and time by editing multiple files with the same changes.
You can rename and resize multiple files with editing of multiple images.
Drawbacks
Due to the limited customization of Batch editing, users should compromise on quality.
It reduces the performance of devices and may cause crashes.
Due to a lack of individual adjustments, you can get the less polished results.
It may take a longer time depending on the complexity of edits.
Due to a lack of proper backup, you can face some difficulty in the reverse changing.
Conclusion
Batch Editing is the most powerful editing tool in Adobe Lightroom. you can get the maximum benefit from it if you are a professional photographer and want to edit the images saving your time and money. The other thing that everyone should care about is that you must use the Batch editing with care and also apply the manual editing in your images if required. So, download the latest version of Lightroom Mod to get the Premium features like batch editing for free.
Frequently Asked Questions
Batch editing is non-destructive which means your original images will not affected by the process of batch editing.
Yes, it allows you to rename and resize the files during the editing of multiple images.
Yes, you can edit your multiple images for free if you download the Lightroom Mod from our website.
]]>
https://lrmodapks.com/batch-editing-tips-to-edit-multiple-images/feed/0Step-by-Step Guide to Import Lightroom Presets on Desktop and Mobile Devices [2025]
https://lrmodapks.com/import-lightroom-presets-on-desktop/
https://lrmodapks.com/import-lightroom-presets-on-desktop/#respondSat, 24 Aug 2024 13:40:20 +0000https://lrmodapks.com/?p=1047
Rate this post
Import Lightroom Presets on Desktop and Mobile Devices
Import Lightroom Presets are Powerful Photo editing tools that could be crucial in the world of Photography for every beginner and professional Photographer. Whether you are working on complex images or simpler pictures you should be able to Import Lightroom Presets. Here we will try our best to make your image quality better by importing the different Lightroom Presets on desktop and mobile devices.
You can Import Lightroom Presets on both Android and iOS devices. To make your editing streamlined and for better editing Import Lightroom Presets is the essential part. You can get a specific look and style by importing the different presets. So, you must read this article carefully to get the different look and style of your images.
How to Import Lightroom Presets on Desktop?
To import Lightroom Presets on the Desktop your PC or Desktop must have the minimum system requirements for Adobe Lightroom. Prestes is the highly demanding feature of the current era. LrC only works on compatible devices of Desktop or PC and it is the type of Adobe Lightroom that is compatible with PC or macOS.
You must follow the given methods to import the Lightroom Presets on your Desktop;
Presets set with Drag & Drop Method
Using Import Option to import Presets
Import Presets based on Preferences
Step 1: Presets set with Drag & Drop Option
Follow the given Guidelines to import the Presets by using Drag & Drop Option;
Navigate to the develop module of Lightroom Classic and find the Lightroom Presets.
Click on the Preset Panel of Lightroom Classic and find the import option.
Organize the Imported presets in a folder where you can easily find them.
To apply any of the Preset you just need to click on the name of the Preset.
Lightroom Classic will automatically detect the Preset by its name.
Now you can get a different look and style of your image.
Step 3: Import Presets based on Preferences
Follow the given guidelines to import Presets based on Preferences;
Go to Lightroom Classic on Your PC or Computer.
Click on the Edit option of Lightroom Classic.
In the Edit Option, you should find the Dropdown menu.
Select the Preferences option from the Dropdown menu.
Go to the Lightroom Presets Panel and select the Preset that you like.
Apply the preset and Lightroom will detect it to change the style and look of the image.
How to Import Lightroom Presets in Mobile?
Import Lightroom Presets works on Android and iOS devices. Lightroom Presets are the same on Mobile and desktop and by using these Presets you can change the style and look of your images.
You should follow the given methods that are used to import the images in Mobile;
Sync Presets with Lightroom Classic
Adding Preset using the Import option
Import Preset by adding the DNG file
Step 1: Sync Presets with Lightroom Classic
This is the Method that can be helpful for you if you want to import the presets to change the look and style of your images. In this method simply you can sync the Lightroom classic presets with the Lightroom CC that can be used on the Mobile.
By using the Adobe Creative Cloud of Lightroom you can synchronize the Lightroom Classic Presets to the Lightroom CC. This is the method that allows you to use the Presets of Lightroom Classic on Mobile devices. So, use the Presets of Lightroom Classic and make your images pure.
Step 2: Adding Preset using the Import option
This is the method that can add the Presets in your images by using the import option of Adobe Lightroom;
First of all, Download the Lightroom CC on your Mobile devices.
Open the Lightroom App and upload your desired image and video.
Find the Preset option in the Lightroom and click on it.
Go to the menu of Lightroom where you can find the import option.
Click on the import option and it will take you to the new window.
After the opening of the window go to navigation settings and find the Panel of Presets.
Now find the imported preset and it will be ready to use.
Click on your favorite imported preset and it will change the look of your image.
Step 3: Import Lightroom Preset by adding the DNG file
To use this DNG file method follow the guidelines that are given below;
First of all, you must download the Preset that you want to use in DNG Format.
Click on the Add Photo button to add the image in Preset.
Go to the Preset Panel where you have stored the preset.
Click on the Import button in the menu to import the DNG Format Preset.
Click on the apply button of Preset and Lightroom will automatically detect it.
Lightroom Classic will apply it to your image and will change the style of the image.
Benefits of Importing the Lightroom Presets
From an older image to the latest images, Lightroom can change the quality of your images from low to high. Here are the key benefits of Importing Lightroom Presets on Desktop and Mobile;
You can solve complex edits in no time by importing different presets.
Importing Presets helps you maintain the style and look of the image.
It helps you to provide the Professional-looking quality of images.
You can get high-quality results in no time and can save time.
It helps you to learn something new from the editing.
You can creatively edit the picture by importing Presets.
Conclusion
Here we tried our best to completely guide you about the importing methods of Import Lightroom Presets and we hope that after this article everyone will edit their images by Import Lightroom Presets. You must follow the given guidelines to use the Lightroom Presets Properly. So, if you are in a hurry and want to make your image look amazing then import Lightroom Presets is the best option for you that will quickly change the style and look of the image. So, we suggest our users import Lightroom Presets if they want to get better results from your edited images.
Frequently Asked Questions
If the importing of Lightroom presets is not shown to you it means the imported presets are available and imported in the correct folder.
You can import the presets as many as you want but much import of Lightroom Presets will slow down the editing process.
Yes, the imported presets will work on all of the devices but the working of presets and how it increases the quality vary from picture to picture.
]]>
https://lrmodapks.com/import-lightroom-presets-on-desktop/feed/0New Method for Addition of Watermark in Lightroom Classic & CC in 2025
https://lrmodapks.com/addition-of-watermark-in-lightroom-classic/
https://lrmodapks.com/addition-of-watermark-in-lightroom-classic/#respondFri, 23 Aug 2024 18:50:50 +0000https://lrmodapks.com/?p=1042
5/5 - (1 vote)
New Method for Addition of Watermark in Lightroom Classic & CC
The addition of your own watermark within your videos and photos is so essential that can save your stuff to be used by everyone. This new method will be very helpful and easy for you to add watermark by using both Lightroom Classic and Lightroom CC. Adobe Lightroom has been used at a wide range of users. This photo and video editing application is very easy to use. That is why several users are utilizing it at a wide range.
If you are looking for a new easy method for addition of your watermark in your won photos and videos to protect them to be randomly used. Then this article will be very helpful. We are going to share some easy and tricky methods to add watermark by using Lightroom Classic and Lightroom CC as well.
What do you mean by watermark?
Term watermark stands for the maker or creator’s name or trademark that symbolize his/her unique property and creativity. It is shown during the nomination or publishing of someone’s assets. So, this is some type of unique symbol that can stand for uniqueness as well. Its use has been increased since the creation of stuff on digital marketing to show someone’s singular property.
Role and Uniqueness of Watermark
Nowadays, several creators are publishing their own stuff by showing their own creativity but several of them also face their audio, video or photos to be used by other users. In this way, some randomly common users can get access to their creativity by stolen their data. That is why, it becomes so much important for them to safe their data to be randomly used.
In this way, addition of watermark can be very helpful for them. There are severl ways to add watermark in their photos and videos. But the use of Adobe Lightroom can be very easy and quick.
Method to add watermark in Lightroom Classic [Desktops]
Lightroom CC is then highly developed version of Lightroom that can work on desktops more fantastic and smoothly. The addition of a watermark in Classic has these two easy methods.
1: Export Presets
You need to follow these steps.
1: Open the Lightroom Classic application on your device.
2: Now go to export dialog. For this purpose, Locate a menu on righ top corner and click on file > export then your export dialog will be opened.
3: Watermark Section: now, you need to enable watermark. In export dialog, scroll down and find out watermark box. Click on this box and select edit watemakr.
4: Customzie Watemark: in this step, you need to customize the watermark just according to your own trademark or name. Here, you will find two possible options “the text watermark” and “the graphic watermark”.
2: Apply Watermark in Export Settings
You can also add a watermark during export settings, text or graphics that you have already created by following these steps.
1: First of all, select your desired image or video quality like mp4 or HD.
2: Thers is a watermark section under the export settings. Click on it, select the created or manual watermark and put it on the right corner of your photo and image.
3: Now, click on export and apply it throught your video to put your own trademark as well.
Method to add watermark in Lightroom CC [Mobile, iOS]
The use of Adobe Lightroom has been so much increased. Its use and application methods are so smooth and user-friendly when using it on Android and iOS devices. Similarly, the addition of a watermark in Lightroom is so much easier and can be done within a few minutes by following some smooth steps. You need to understand these methods.
1: Text Watermark
1: Go to settings shown by three dots.
2: Then locate the export settings and click on watermark section, put it on and it will include your watermark in your video.
3: Now, you need to click on customize settings.
4: After selecting customize settings, you need to click on “add text”.
5: Now, you have successfully text watermark. You can make necessary changes within it such as fonts style, coloring, opacity, and much more.
2: Graphic Watermark
Follow these few steps to add a graphic watermark by using Lightroom CC
1: Open the settings section.
2: Next, click on export settings.
3: Click on add watermark enable.
4: Follow, customization settings.
5: Locate “Graphic” and put your graphical watermark.
6: Edit the required settings of the graphical watermark and mark it done.
3: Image Logo Watermark
1: You can put your image as a watermark through these ste
2: You need to remove the background from your image.
3: Convert your image into PNG format. It is a much-needed step.
4: Then it would be best if you went to settings>exports settings >add watermark >customize >finalize
Exploring Text Watermark
It is the type of watermark which only contains text concerning your name or trademark and can be easily edited. You can edit and customize the text watermark by following the steps.
1: Fonts: Select your desired type of text’s fonts.
2: Colour: There are bundles of different types of colors. You should select a professional color.
3: Style: you can give a unique style to your fonts such as italic or bold.
4: Appearance or opacity: you can set the outlook of your fonts just like transparent text as well.
5: Size: Set the suitable and accurate size of your text.
6: Position & Alignment: Set the position of text like top, bottom or centre. You can also align it on different corners.
Exploring the Graphic Watermark
The graphic watermark can be more fantastic and can even put a 3D appearance to your watermark as well. A transparent graphic can be also put. In this, it is possible option for you to upload a graphic watermark which can be fully customized by adopting these steps.
1: Opacity: Adjust the transparency of your image.
2: Size: Customize it according to your desired size.
3: Anchor & Alignment: Set your image just according to the most suitable appearances by setting different anchor positions and alignment as well.
Additional Tips Regarding Professional Watermark
1: Keep your watermark more noticeable and eye-catching.
2: You should not put so much opacity while customizing a watermark.
3: Always put your company name or trademark that can show some uniqueness.
4: To put some consistency in your brand, you need to use your unique watermark throughout the whole process of advertising stuff.
5: the batch processing process can work in Lightroom in Lightroom which can put the watermark into your whole slide of images. But in Lightroom cc, you need to put it in every photo.
Ending Thoughts
These steps can be very helpful for you while putting a watermark in Lightroom CC and Lightroom Classic. You need to understand that a watermark is something exceptional that can protect your data from being by other random people. That is why, it is always recommended to use a unique and professional watermark in your stuff in this world of social media.
That is why, Lightroom provides you addition of your watermark in its both versions Lightroom CC and Lightroom Classic. By using these versions on your mobile and PC, you can easily put watermarks in the format of text, graphics or image logos as well. So, it expands some more ways for users.
A watermark is your unique trademark that protects your stuff from being used randomly and symbolises your property.
Definitely, you can and it is a more creative and easy way of organizing watermark.
You can do it only within the Lightroom Classic version.
You can add and put some creativity while customization.
In Lightroom cc, you need to add this setting manually for each photo but using Lightroom Classic puts these settings more smoothly.
]]>
https://lrmodapks.com/addition-of-watermark-in-lightroom-classic/feed/0How to Organize Photos in Lightroom Efficiently in 2025?
https://lrmodapks.com/organize-photos-in-lightroom/
https://lrmodapks.com/organize-photos-in-lightroom/#respondSun, 18 Aug 2024 17:53:04 +0000https://lrmodapks.com/?p=1016
5/5 - (1 vote)
How to Organize Photos in Lightroom Efficiently in 2025?
It is essential to know how to organize photos in Lightroom efficiently because it can make your workflow better and so much more organized. Adobe Lightroom has been used on a wide range of to add different styles and outlook to the photos. Users are using Adobe Lightroom to put more efficient results within their photos. You have to make use of this wonderful application in the best and most effective way.
This article will help you to organize photos in Lightroom more efficiently and perfectly. Whether you are using Lightroom for the first time or have been using it for a long time, this tutorial will be very helpful for you. By following these steps you will be able to organize photos in Lightroom in a more organized and effective way.
Step to Organize Photos in Lightroom
There are following few important steps to be followed to make the perfect photo organization within Lightroom.
1: Import
Importing photos is the very first step. It includes the following options.
Create Folder Structure: you should organize a consistent folder structure within Adobe Lightroom before importing any type of photos. It will help you to organize folders date-wise like months, years, or days.
Metadata & Keywords: Organizing photos in Lightroom by using keywords and metadata has been great practice. It helps you to find your photos within the library by putting different metadata and keywords as well.
2: Create a Catalog
Creating a catalog system helps better organize photos in Lightroom. It is the very first window that opens when you find your photo library. There are two possible options for you; you can create a new catalog if you have never created one before or secondly make use of already created catalogs. You can go with a new catalog for each new event. It will organize photos in Lightroom more professionally.
3: Utilize Collections System
By utilizing different types of collections you can just make the perfect photo organization. Hence it is recommended to use the collectins system as described below. It’s optional for you as well.
Create New Collections: it is the better option to create some new collections for your new clients. You can organize photos in Lightroom for every client by utilizing this wonderful collection system.
Smart Collections: This type of collection helps you to organize photos in Lightroom in a smart way. You can organize a photo library in a concise way like yearly, weekly, or monthly organizing method. These smart collections will automatically add the criteria matching photos as well.
4: Utilizing Presets Importing
It is another better possible option to import your photos within Lightroom by utilizing the presets importing system. This system can better handle organized photos in Lightroom. It is recommended to set the photos according to every Lightroom Presets. In this way, you can find each photo just according to the settled name of Lightroom Presets. So, utilizing a preset importing system will better help you to organize the photos.
5: Rating & Flagging
This can be a wonderful option for you while organizing photos in Lightroom. You can utilize it by following the steps.
Assign Colors: While organizing photos you should assign different types of colors such as red for urgent editings and green for completed editings. This can help you in better sortings and wasting time to find out the photos.
Assign Flags: if you are sorting out a big library of photos or going to organize photos in Lightroom then utilizing flags can be fit for you. Mark flag picked “P” and rejected “X”. these flags will help you to organizing to delete and save the photos within library.
6: Profiles Recognization
Profile recognition or face recognition will help you to tag different people within the photo library. You can assign photos to different people’s pictures and can put them in a separate folder. This will help you to better sort out different of pictures with different faces.
7: Utilizing filter bar
When sorting out a image in the huge library then utilize filter bar within the library module. You can use these filter bar with respect of images size, date, device model, camera type, lens model, and keywords as well.
You can also make use of some custome filters to sort out these picture while organize photos in Lightroom.
8: Back Up Catalog [Very Essential]
It is a very important step to be adopted while organizing photos in Lightroom. The catalog contains more important data within its database. That is why you need to save it. You can adopt the following options.
External Back up: it is better for you to keep an external back up of catalog such as back up in hard drive or SSD of external storage.
Cloud Regular Back up: the cloud regular back up is very essential to be consider becaue it is the cloud base data which is very safe and easy to access
Role of Adobe Creative Cloud
Adobe Creative Cloud plays a very important role in organizing photos in Lightroom. If you are using Lightroom CC then you should make use of Adobe’s Creative Cloud. It enables the users to get access to all staff at any time and on any device. In this way, your whole data is very safe and secure within the creative cloud. You can store all backups of photos and videos within it.
Additional Tips and Tricks
It is best practice to always delete the unwanted stuff from the photo library.
You should make use of some key shortcuts to find out any type of specific data from your library. These keys can be easily utilize within the Adobe Lightroom.
Always organize your library in a smooth and stable way so that you can easily get access to it.
Always keep back up about your data within the cloud flare within adobe creative cloud.
Keywording and meta tagging is very best to utilize to organize photos in Lightroom.
Ending Thoughts
These practices are very best to utilize and can be done smartly. All these steps are very accurate and perfect for organizing photos in Lightroom. You can utilize these steps so that you can put more creativity within your photo library. In this way, you can make utilize of these steps with your fingertips and can efficiently organize your photo library.
This practice will help you to sort out and get access to your photos so quickly. Hence it is very crucial to organize photos in Lightroom.
These are some sort of collections that work automatically according to the database according to your settled criteria.
Assigning different types of keywords to the specific collections of photos will quickly help you to find different types of photos within a huge library.
]]>
https://lrmodapks.com/organize-photos-in-lightroom/feed/0Essential Tools and Techniques for Lightroom Mod Apk 2025
https://lrmodapks.com/techniques-for-lightroom-mod-apk-2024/
https://lrmodapks.com/techniques-for-lightroom-mod-apk-2024/#respondSun, 11 Aug 2024 11:21:33 +0000https://lrmodapks.com/?p=1006
Rate this post
Essential Tools and Techniques for Lightroom Mod Apk 2025
If you want to become a master in editing then you must know about the essential tools and technologies of Lightroom Mod Apk 2024. Adobe Lightroom Mod is a powerful editing tool used to edit images and videos with powerful features. Lightroom Premium Apk is used to manage images and videos with the latest tools and technologies of Adobe Lightroom. Lightroom Mod Apk 2024 is one of the powerful photo editors that uses its AI technology for professional-looking images. Here we will try our best to guide our users about the latest tools and technologies of Lightroom Mod Apk 2024 that will play a key role in the editing of images and videos.
What are the Essential Tools Lightroom Mod Apk 2024?
Essential tools and technologies are specific features or plugins that edit Lightroom Mod Apk 2024 streamlined. In this digital world, many artists of photography wonder which application is most suitable for their professional editing. Most of the time they did not pick a good photo and video editor so they created much confusion in this regard. Here we come to guide our users that Lightroom Mod APk has some amazing tools and technologies that will take your editing to the next level.
Here are the important tools and techniques that are commonly used for editing;
Develop Module
In this Module, maximum tools are present that play the key or basic role in the editing of images and videos. You can get most of the basic adjustment tools from the development module. Here you can find the basic adjustment tools like contrast, highlights, and white & black shadows. You can arrange the tunes of your images by fine-tuning them. With this feature of Lightroom Mod Apk, you can also saturate the specifications of your images. It also gives you a chance to highlight the image with colors for the creativity of the image. In the Develop module, you can find the different tools for sharpening the image and for the noise reduction of the image.
AI Enhancements
This is the technique where you can replace the background of your images using AI enhancement tools. AI Enhancement tools can enhance the quality of your images by detecting the background of your images and automatically replacing them with the sky. It also allows you to directly target the image’s main subject and edit them with ease. This is the technique where you can reduce the noise in low-light images with precision. In simple words, this is the best tool of Lightroom Mod Apk 2024 where you can change the background of the image and many things manually.
Presets & Profiles
This is the tool where you can arrange your profile by using different kinds of presets and tools. In this technique, you can use the built-in preset that has predefined settings. These settings should be applied to your images and in this way, you can achieve a good look of your image. This tool of Lightroom Mod Apk 2024 allows you to create and save certain Presets that you want to apply to multiple images. In the Profile, you can use certain tools and adjustment features that can serve as the starting point for the further editing of your images and profiles.
Adjustment & Export
This is the feature where you can edit your image by using local tools of Lightroom Mod Apk 2024. It allows you to use the adjustment brush for the precise editing of the image. To gradually change the specific area of the image you can use the gradual filter of Lightroom Mod Apk 2024.
It also allows you to export the image after the editing of the image. You can save time by using the different customizable export options of Lightroom Mod Apk 2024. Lightroom has a feature where you can add text and graphics to your image if you want to make your logo on that image. You can also get the edited image without any kind of watermark. It allows you to export the edited image directly to social media or you can print it for physical use.
Benefits of Tools and Techniques of Lightroom Mod Apk
Here are the key benefits of Lightroom Mod Apk 2024 that a user commonly faces during the editing of images;
It can help you the streamline workflow of your images.
You can use AI-powered efficiency for the reduction of noise.
You can edit your images even when you are offline.
You can get the high-quality output by using these tools and techniques.
You can create high-quality images by using extensive editing tools.
Conclusion
Lightroom Mod Apk 2024 tools and techniques are the best way to edit your images in a professional-looking style. These tools and techniques made this application a brand in the world of digital photography. So, if you are excited and want to try these tools and techniques of Lightroom Mod Apk 2024 then you must download the Lightroom Mod from our website. You can also get the premium version of Lightroom Mod Apk for free if you download it from our website. So, download it and make your editing easy and enjoyable.
Frequently Asked Questions
Non-destructive editing is the technique where Lightroom changes your image’s shape but you can revert it to the original image at any time.
Yes, Lightroom Mod Apk 2024 allows you to edit videos with these tools and techniques. It allows you to edit them and export them.
Yes, the use of these tools and techniques is safe and easy to use and everyone can edit their images with a little bit of knowledge of Lightroom.
]]>https://lrmodapks.com/techniques-for-lightroom-mod-apk-2024/feed/0Role of AI in Lightroom Mobile Latest Version and How it Works in Editing [2025]
https://lrmodapks.com/lightroom-mobile-latest-versions/
https://lrmodapks.com/lightroom-mobile-latest-versions/#respondWed, 31 Jul 2024 12:32:07 +0000https://lrmodapks.com/?p=997
3.7/5 - (3 votes)
Role of AI in Lightroom Mobile
Lightroom Mobile is such a modern application where you can edit your images and make them professional by applying the use of AI. Many people did not know that AI has a key role in Lightroom and you can make your images stunning by using AI. If you did not know what type of use AI has in Lightroom Mobile then this article is helpful for you. If you are worried about your blurred images and want to edit them like a Professional then follow the given instructions and make yourself a Professional editor by using AI in Lightroom Mobile in the field of photography.
AI has a significant impact on the editing of Adobe Lightroom. AI can make the Lightroom more powerful by enhancing its capabilities. It can make the Lightroom Mobile more efficient in the field of Photography by making it accessible to everyone. AI integrates with the Lightroom Mod App and makes it brand with the help of its powerful tools and features. Here we will thoroughly discuss what type of key role AI has in the world of editing of Adobe Lightroom Mobile. Here you can find how AI will work in Adobe Lightroom App and Adobe Sensi.
Here is the key role of AI that integrates with Lightroom Mobile;
Automatic Setting
AI has a key Role in the Auto settings of the images to analyze the image and make it clear by exposing it in contrast and light. AI-powered auto setting in Lightroom uses Adobe Sensi to make it stunning by automatically adjusting the colors of the image. The auto settings of Adobe Lightroom Mobile provide a good starting point to edit the image by making the overall appearance of the image good. So, in the auto settings of the image to make the overall appearance good AI Played a key role.
AI Masking and Selection
AI has much significant impact on the masking and selection of images. AI can detect the background of the images, different elements of the image, and subjects. AI can automatically adjust these areas of the images to make them clear and precise. AI can select any subject of the image to automatically adjust it without manual selection of the image. AI can provide different tools for masking that will help the users to create the more accurate and to remove the complexity from the image.
Enhancement
This is the feature of Adobe Lightroom Mobile where you can enhance the quality of the image by enhancing the detail of the image. In the enhancement of the image, AI enhances the details of the images by improving the quality of images. AI enhances the sharpness of the image to make a high-resolution image. This feature of Lightroom Mobile is best for those who want to edit their images working with a large number of images or for those who want to refine the quality of the images.
Presets & Profiles
In Lightroom Mobile, there are AI Presets and Profiles that can be helpful for the automatic adjustments of images. You can adjust the desired effects of the images by using the AI presets and filters of Lightroom Mobile. You can adjust the desired artistic of the images as well by using AI Presets. You can get the best and most consistent results from images if you are using the AI presets and Profiles Adobe Lightroom Mod Apk. These tools and filters can simplify the editing process of Lightroom Pro Mod Apk.
AI Grading
Grading is one of the powerful features of Lightroom Apk that can be used at every stage of editing of the images. AI suggests different colors for the process of grading and editing. AI can help you with the corrections of the colors and enhancement in the color grading. If you are using AI Grading to adjust the quality of the images then you can achieve the most suitable and stunning look of the images. You can also get the image’s specific look and mood if you use AI Color Grading in your images.
Benefits of AI in Lightroom Mobile
AI has several benefits in Adobe Lightroom for editing images. Here are some benefits that everyone should know;
AI can make editing speedy and save you time and effort.
You can get consistent results of batch photos across all formats.
AI can make editing possible by providing it to all users.
You can make your editing accessible to everyone by using the AI Presets.
Ending Thoughts
Here we tried our best to describe the role of AI in Lightroom Mobile thoroughly. AI can make your images stunning with just one click. AI edits Lightroom more powerful and easy. All of the features of Adobe Lightroom can work efficiently in the presence of AI. AI can enhance the complex tasks of the images by enhancing the user experience of the Adobe Lightroom Mod App. AI is the only technology in the Adobe Lightroom App where you can edit your images in a precise manner. So, if you want to download the Lightroom App for free with all of its AI features unlocked then you can get it from the given link.